Overview
This notebook demonstrates how to scan for TF binding motifs. The base GRN will be generated by combining the ATAC-seq peaks and motif information.
Notebook file
Notebook file is available on CellOracle’s GitHub page. https://github.com/morris-lab/CellOracle/blob/master/docs/notebooks/02_motif_scan/02_atac_peaks_to_TFinfo_with_celloracle_20200801.ipynb
0. Import libraries
[1]:
import pandas as pd
import numpy as np
import matplotlib.pyplot as plt


import seaborn as sns

import os, sys, shutil, importlib, glob
from tqdm.notebook import tqdm
[2]:
import celloracle as co
from celloracle import motif_analysis as ma
from celloracle.utility import save_as_pickled_object
co.__version__
[2]:
'0.13.1'
[3]:
%config InlineBackend.figure_format = 'retina'
%matplotlib inline

plt.rcParams['figure.figsize'] = (15,7)
plt.rcParams["savefig.dpi"] = 600
1. Rerefence genome data preparation
Before starting the analysis, we need to make sure the reference genome data is installed with genomepy. If not, please install the correct reference genome using the instructions below.
genomepy installs reference genome data under home directory. But if you have installed or want to install reference genome to another specific location, please specify the place using genomes_dir argument.
[4]:
# PLEASE make sure reference genome is correct.
ref_genome = "mm10"

genome_installation = ma.is_genome_installed(ref_genome=ref_genome,
                                             genomes_dir=None)
print(ref_genome, "installation: ", genome_installation)
mm10 installation: True
Before installing the reference genome, please check the refenome is in the celloracle supported reference genome list. You can check supported reference genome using ma.SUPPORTED_REF_GENOME
If your reference genome is not in the list, please send a request to us through CellOracle GitHub issue page.
[5]:
ma.SUPPORTED_REF_GENOME
[5]:
| species | ref_genome | provider | |
|---|---|---|---|
| 0 | Human | hg38 | UCSC |
| 1 | Human | hg19 | UCSC |
| 2 | Mouse | mm39 | UCSC |
| 3 | Mouse | mm10 | UCSC |
| 4 | Mouse | mm9 | UCSC |
| 5 | S.cerevisiae | sacCer2 | UCSC |
| 6 | S.cerevisiae | sacCer3 | UCSC |
| 7 | Zebrafish | danRer7 | UCSC |
| 8 | Zebrafish | danRer10 | UCSC |
| 9 | Zebrafish | danRer11 | UCSC |
| 10 | Xenopus tropicalis | xenTro2 | UCSC |
| 11 | Xenopus tropicalis | xenTro3 | UCSC |
| 12 | Xenopus laevis | Xenopus_laevis_v10.1 | NCBI |
| 13 | Rat | rn4 | UCSC |
| 14 | Rat | rn5 | UCSC |
| 15 | Rat | rn6 | UCSC |
| 16 | Drosophila | dm3 | UCSC |
| 17 | Drosophila | dm6 | UCSC |
| 18 | C.elegans | ce6 | UCSC |
| 19 | C.elegans | ce10 | UCSC |
| 20 | Arabidopsis | TAIR10 | Ensembl |
| 21 | Chicken | galGal4 | UCSC |
| 22 | Chicken | galGal5 | UCSC |
| 23 | Chicken | galGal6 | UCSC |
| 24 | Guinea_Pig | Cavpor3.0 | Ensembl |
| 25 | Pig | Sscrofa11.1 | Ensembl |
| 26 | Axolotl | AmexG_v6.0-DD | Axolotl-omics.org |
[6]:
if not genome_installation:
    import genomepy
    genomepy.install_genome(name=ref_genome, provider="UCSC", genomes_dir=None)
else:
    print(ref_genome, "is installed.")
mm10 is installed.
2. Load data
In this notebook, we explain how to make a base GRN.
Please look at the previous steps for details on preprocessing data for a base GRN
The scATAC-seq file needs to be converted in a csv file three columns: - The first column is index. - The second column is peak_id. - The third column is gene_short_name.
A correctly formatted file will look like this:
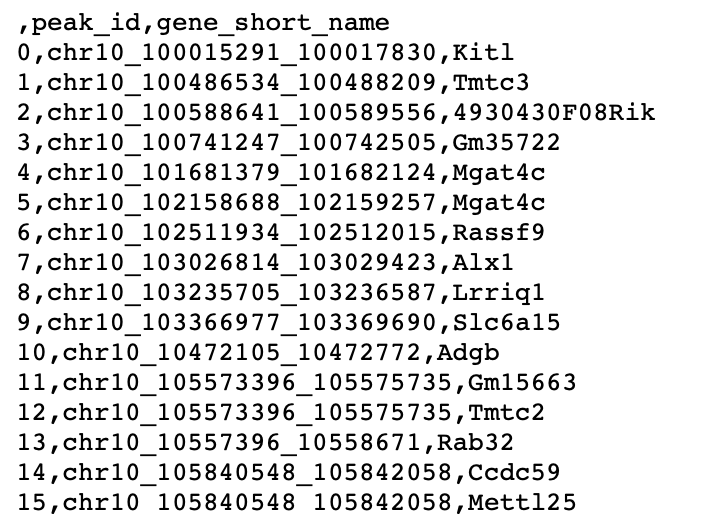
We will load the .csv file as a pandas.DataFrame using pd.read_csv().
You can download the demo file by running the following command.
Note: If the file download fails, please manually download and unzip the data.
[7]:
# Download file.
!wget https://raw.githubusercontent.com/morris-lab/CellOracle/master/docs/demo_data/processed_peak_file.csv

# If you are using macOS, please try the following command.
#!curl -O https://raw.githubusercontent.com/morris-lab/CellOracle/master/docs/demo_data/processed_peak_file.csv
--2023-07-08 17:00:17--  https://raw.githubusercontent.com/morris-lab/CellOracle/master/docs/demo_data/processed_peak_file.csv
Resolving raw.githubusercontent.com (raw.githubusercontent.com)... 185.199.108.133, 185.199.109.133, 185.199.110.133, ...
Connecting to raw.githubusercontent.com (raw.githubusercontent.com)|185.199.108.133|:443... connected.
HTTP request sent, awaiting response... 200 OK
Length: 569448 (556K) [text/plain]
Saving to: ‘processed_peak_file.csv’

processed_peak_file 100%[===================>] 556.10K  --.-KB/s    in 0.01s

2023-07-08 17:00:17 (38.0 MB/s) - ‘processed_peak_file.csv’ saved [569448/569448]
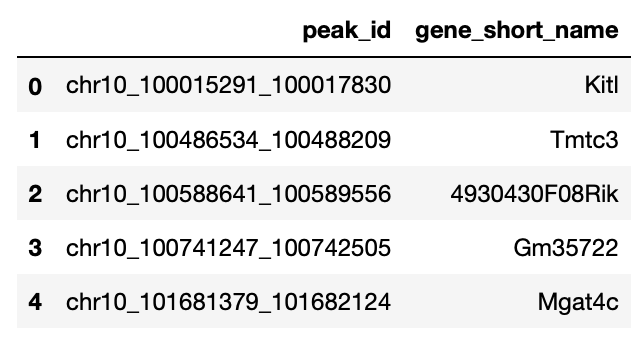
[7]:
# Load annotated peak data.
peaks = pd.read_csv("processed_peak_file.csv", index_col=0)
peaks.head()
[7]:
| peak_id | gene_short_name | |
|---|---|---|
| 0 | chr10_100015291_100017830 | Kitl |
| 1 | chr10_100486534_100488209 | Tmtc3 |
| 2 | chr10_100588641_100589556 | 4930430F08Rik |
| 3 | chr10_100741247_100742505 | Gm35722 |
| 4 | chr10_101681379_101682124 | Mgat4c |
Here, the function below will check peak data format, including chromosome name and peak length.
[8]:
peaks = ma.check_peak_format(peaks, ref_genome, genomes_dir=None)
Peaks before filtering:  15779
Peaks with invalid chr_name:  0
Peaks with invalid length:  2
Peaks after filtering:  15777
You can chose to use either a custom TF binding reference or CellOracle’s default motifs during the motif analysis. If you would like to use our default motifs, you can continue to the next step without loading any additional data.
If you would like to use a custom motif dataset, please choose one of the following options.
Motifs provided by gimmemotifs >Gimmemotifs is a python package for motif analysis. It provides many motif dataset. https://gimmemotifs.readthedocs.io/en/master/overview.html#motif-databases > > Please use this notebook to learn how to load motif data from gimmemotifs database. > https://github.com/morris-lab/CellOracle/blob/master/docs/notebooks/02_motif_scan/motif_data_preparation/01_How_to_load_gimmemotifs_motif_data.ipynb
Custom motifs provided by CellOracle.
CellOracle also provides many motif datasets generated from CisBP. http://cisbp.ccbr.utoronto.ca/
Please look at this notebook to learn how to load the CisBP motifs.https://github.com/morris-lab/CellOracle/blob/master/docs/notebooks/02_motif_scan/motif_data_preparation/02_How_to_load_CisBPv2_motif_data.ipynb
Make your own custom motif data. >You can create custom motif data by yourself. > >Please look at this notebook to learn how to create your custom motif dataset.https://github.com/morris-lab/CellOracle/blob/master/docs/notebooks/02_motif_scan/motif_data_preparation/03_How_to_make_custom_motif.ipynb
3. Instantiate TFinfo object and search for TF binding motifs
The motif analysis module has a custom class, TFinfo. The TFinfo objectexecutes the steps below.
Converts a peak data into a DNA sequences.
Scans the DNA sequences searching for TF binding motifs.
Post-processes the motif scan results.
Converts data into appropriate format. You can convert data into base-GRN. The base GRN data can be formatted as either a python dictionary or pandas dataframe. This output will be the final base GRN used in the GRN model construction step.
If your reference genome file are installed in non-default location, please speficy the location using genomes_dir.
[9]:
# Instantiate TFinfo object
tfi = ma.TFinfo(peak_data_frame=peaks,
                ref_genome=ref_genome,
                genomes_dir=None)
You can specify the TF binding motif data as follows.
tfi.scan(motifs=motifs)
If you do not specify the motifs or set motifs to None, the default motifs will be loaded automatically.
For mouse and human, “gimme.vertebrate.v5.0.” will be used as the default motifs.
For another species, the species-specific TF binding motif data extracted from CisBP ver2.0 will be used.
If your jupyter notebook kernel is killed during the motif scan process, please see the link below.
[11]:
%%time
# Scan motifs. !!CAUTION!! This step may take several hours if you have many peaks!
tfi.scan(fpr=0.02,
         motifs=None,  # If you enter None, default motifs will be loaded.
         verbose=True)

# Save tfinfo object
tfi.to_hdf5(file_path="test1.celloracle.tfinfo")
[12]:
# Check motif scan results
tfi.scanned_df.head()
[12]:
| seqname | motif_id | factors_direct | factors_indirect | score | pos | strand | |
|---|---|---|---|---|---|---|---|
| 0 | chr10_100015291_100017830 | GM.5.0.Homeodomain.0001 | TGIF1 | TGIF1, ENSG00000234254 | 10.288487 | 1003 | 1 |
| 1 | chr10_100015291_100017830 | GM.5.0.Mixed.0001 | SRF, EGR1 | 7.904716 | 481 | 1 | |
| 2 | chr10_100015291_100017830 | GM.5.0.Mixed.0001 | SRF, EGR1 | 7.301316 | 911 | -1 | |
| 3 | chr10_100015291_100017830 | GM.5.0.Mixed.0001 | SRF, EGR1 | 7.257605 | 811 | -1 | |
| 4 | chr10_100015291_100017830 | GM.5.0.Mixed.0001 | SRF, EGR1 | 6.936637 | 1211 | 1 |
We have the score for each sequence and motif_id pair. In the next step we will filter the motifs with low scores.
4. Filtering motifs
[13]:
# Reset filtering
tfi.reset_filtering()

# Do filtering
tfi.filter_motifs_by_score(threshold=10)

# Format post-filtering results.
tfi.make_TFinfo_dataframe_and_dictionary(verbose=True)
5. Get final base GRN
[14]:
df = tfi.to_dataframe()
df.head()
[14]:
| peak_id | gene_short_name | 9430076c15rik | Ac002126.6 | Ac012531.1 | Ac226150.2 | Afp | Ahr | Ahrr | Aire | ... | Znf784 | Znf8 | Znf816 | Znf85 | Zscan10 | Zscan16 | Zscan22 | Zscan26 | Zscan31 | Zscan4 | |
|---|---|---|---|---|---|---|---|---|---|---|---|---|---|---|---|---|---|---|---|---|---|
| 0 | chr10_100015291_100017830 | Kitl | 0.0 | 0.0 | 0.0 | 0.0 | 0.0 | 1.0 | 1.0 | 0.0 | ... | 0.0 | 0.0 | 0.0 | 0.0 | 0.0 | 0.0 | 1.0 | 0.0 | 0.0 | 0.0 |
| 1 | chr10_100486534_100488209 | Tmtc3 | 0.0 | 0.0 | 0.0 | 0.0 | 0.0 | 0.0 | 0.0 | 0.0 | ... | 1.0 | 0.0 | 0.0 | 0.0 | 0.0 | 0.0 | 1.0 | 0.0 | 0.0 | 0.0 |
| 2 | chr10_100588641_100589556 | 4930430F08Rik | 0.0 | 0.0 | 1.0 | 0.0 | 0.0 | 1.0 | 1.0 | 0.0 | ... | 0.0 | 0.0 | 0.0 | 0.0 | 0.0 | 0.0 | 0.0 | 0.0 | 0.0 | 0.0 |
| 3 | chr10_100741247_100742505 | Gm35722 | 0.0 | 0.0 | 0.0 | 0.0 | 0.0 | 0.0 | 0.0 | 0.0 | ... | 0.0 | 0.0 | 0.0 | 0.0 | 0.0 | 0.0 | 0.0 | 0.0 | 0.0 | 0.0 |
| 4 | chr10_101681379_101682124 | Mgat4c | 0.0 | 1.0 | 0.0 | 0.0 | 0.0 | 0.0 | 0.0 | 0.0 | ... | 0.0 | 0.0 | 0.0 | 0.0 | 0.0 | 0.0 | 0.0 | 0.0 | 0.0 | 1.0 |
5 rows × 1096 columns
6. Save results
We will use this information when constructing the GRN models later. Save the results.
[15]:
# Save result as a dataframe
df = tfi.to_dataframe()
df.to_parquet("base_GRN_dataframe.parquet")
We will use this base GRN data in the GRN construction section.
https://morris-lab.github.io/CellOracle.documentation/tutorials/networkanalysis.html
[ ]: